Essential Guide: How to Stop Bleeding in the Wilderness
Emergencies can strike when you least expect them, especially when you’re enjoying the beauty of the wilderness. One of the most crucial skills anyone heading into nature should have is the ability to manage injuries, particularly, to effectively stop bleeding. Whether you’re hiking, camping, or engaging in any outdoor activity, knowing the basics of haemostasis (the process of stopping bleeding) can be lifesaving. Here’s your essential guide on how to stop bleeding when faced with an emergency far from professional medical help.
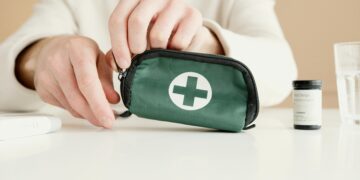
Preparation: Supplies You Need in Your First-Aid Kit
Before you even step onto the trail, make sure your first-aid kit is stocked with the right supplies. Here’s a quick checklist to help you prepare:
- Sterile Gauze Pads: Essential for applying pressure to a wound and absorbing blood.
- Adhesive Bandages: Useful for small cuts or abrasions.
- Hemostatic Agents: Products like QuickClot can speed up the blood clotting process significantly.
- Medical Tape: To secure gauze or bandages in place.
- Nitrile Gloves: To protect both the caregiver and the patient from infections.
- Scissors: For cutting tape or clothing if necessary.
- Antiseptic Wipes: For cleaning wounds or hands before treatment begins.
Equipping yourself with these items will prepare you to handle most bleeding emergencies you might encounter in the wilderness.
Recognizing the Type of Bleeding
Minor vs. Major Bleeding
Understanding the severity of the bleeding is your first step:
- Minor Bleeding: This involves small cuts or scrapes that can be easily managed with simple first aid.
- Major Bleeding: This is more severe and requires immediate attention to prevent significant blood loss.
Step-by-Step Procedure to Stop Bleeding
Step 1: Ensure Safety
First and foremost, ensure that both you and the injured person are safe from any ongoing risk or further harm. Do not attempt to provide any form of aid until this is ensured.
Step 2: Apply Pressure
With clean hands (put on those nitrile gloves if you have them), apply direct pressure to the wound with a sterile gauze pad or a clean cloth. This simple action is often enough to stop minor bleeding. For major wounds, continue applying pressure until help arrives or the bleeding stops.
Step 3: Elevate the Injury
If possible, elevate the injured area above the level of the heart. This reduces blood flow to the area, helping to slow and eventually stop the bleeding.
Step 4: Use a Hemostatic Agent
If you have a hemostatic agent in your first-aid kit, and the bleeding is significant, apply it according to the product instructions. These agents can be crucial in promoting rapid clotting.
Step 5: Secure the Bandage
Once the bleeding is under control, secure the dressing with medical tape. Ensure it’s tight enough to maintain pressure but not so tight that it cuts off circulation.
When to Seek Professional Medical Help
Always seek professional medical help if:
- The bleeding doesn’t stop despite your efforts.
- The wound is deep or large.
- There is an embedded object within the wound.
- You suspect a fracture or other serious injuries.
Additional Tips and Tricks
- Stay Calm: Keeping a cool head is vital. Panic can increase your heart rate, leading to faster bleeding.
- Practice Makes Perfect: Regularly review and practice these skills and ensure your first-aid knowledge is always fresh.
- Educational Courses: Consider taking a wilderness first aid course to enhance your skills and confidence in handling such emergencies.
Conclusion
Heading into the wilderness requires preparation, and knowing how to respond to medical emergencies is a crucial part of that preparation. This essential guide on how to stop bleeding in the wilderness should empower you to handle unexpected situations effectively. Always have a well-stocked first-aid kit, and don’t hesitate to seek professional medical assistance when necessary. Remember, in the wilderness, being well-prepared is not just a benefit—it’s a necessity. Wishing you safe and adventurous travels!